Return to flip book view
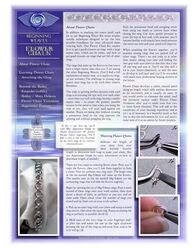
Both the permanent bend and pringling result from using too much or uneven force when In addition to teaching the weave itself each closing the ring Use slow gentle pressure to kit in our Beginning Weave Kit series teaches cross the tips at first and with practice you ll specific techniques designed to lay the best become familiar with exactly how much pressure possible foundation for more advanced chain the metal can take and your speed will improve weaving skills Our Flower Chain Kit teaches how to get a good closures on rings with a large When attaching the flowers together you ll aspect ratio which can be tricky and how to practice closing rings that are packed full of get good closures on rings that are full of other other rings There s no real trick to it other rings than simply taking your time and finding the best grip with your pliers so that they don t slip The rings that make up the flowers in this weave off the ring and scar it You ll use this skill a have a larger aspect ratio than you ll see among lot in your future chainwork so take the time the other Beginning Weaves You ll find a full to develop it well now and you ll be rewarded explanation of aspect ratio as it applies to rings with much more professional looking closures in on our website The challenge in closing large the future aspect ratio rings has to do with their relative flimsiness Flower Chain develops a subtle natural spiral along its length which adds another dimension The trick to getting perfect closures with such to its movement and is usually an asset If rings is in crossing the tips well over each other you would prefer to eliminate the spiral read more than you will with rings having a smaller the pertinent section under Flower Chain aspect ratio to create the greatest possible Variations after you ve made your first two tension in the metal so that when you bring the or three flower elements This will add to the ends in line they will push hard against one complexity of your learning experience and it another Focus on doing this without creating isn t at all necessary to a beautiful result so feel a permanent bend in the ring opposite the free to skip this information for now and simply opening and without pringling the ring make note of it as an option for future projects About Flower Chain beginning weaves flower chain Copyright 2003 10 Urban Maille Inc All Rights Reserved urbanmaille com KIT01 Flower Chain Weave Kit About Flower Chain Learning Flower Chain Attaching the Clasp Beyond the Basics Kitpacks refills Bolder More Delicate Flower Chain Variations Apprentice Projects Legal copies of these instructions display a holographic registration number here If this is your first kit you ll need The Apprentice Guide to Maille Construction Jewelry Design before beginning You ll find a link to the free download on the front page of our website urbanmaille com 1a Weaving Flower Chain Subtract the length of your clasp from your ideal finished bracelet length to determine how long to make your chain See our Apprentice Guide for more information on how to determine length if needed There are two steps to weaving flower chain First you ll make the flowers then you ll link them together to form a chain Your kit contains two ring sizes The larger ones in the tin marked 18g 5 0mm will make up the flowers The smaller ones in the tin marked 18g 4 0mm are the connecting rings that will link the flowers together Begin by opening the tin of 18g 5 0mm rings Pour a small mound of these rings onto your work surface then close about a dozen of them as perfectly as you can and set them aside Open about twice the number of rings you closed and lay them out on your work surface 1 Pick up an open ring with your pliers and scoop a closed ring onto it then close the open ring Focus on closing the ring as perfectly as possible 1a b 2 Hold each of the two rings in your fingertips and or plier tips and rotate the one on the right clockwise turning the top of the ring up and away from you as far as it will go 2 Beginning Weaves Flower Chain 03 10 pg 1 4 1b 2 Message
3a 5a 3 Slip an open ring through both of those rings and close it 3a b 4 While holding the first ring turn the one you just closed clockwise as far as it will go so that the rings are arranged like overlapping fish scales as shown in photo 4 5 Push the rings together and take the flower between the tips of your pliers without disturbing the arrangement Lay it neatly to the side of your work surface 5a b c 3b 5b 6 Repeat these steps until your first dozen flowers are made and laid out on your work surface 6 Close your open ring tin and set it aside Open the tin marked 18g 4 0mm pour out a small mound then open about two dozen rings 5c 8 Pick up an open ring with your pliers and slip it through the center of the flower making sure it goes through all three rings that make up the flower 7 8 9 Pick up a second flower and put it on the same open ring Carefully position the tips of your pliers for a firm but gentle grip and close the ring If you have any trouble finding a grip because the ring is so full just be patient and jiggle the rings to settle and reposition them 9a b 6 10 Once you have the ring closed smoothly select another open ring with your pliers and put it through the same two flowers so it will lie alongside the ring you just added closing it precisely as well Closing this ring might feel slightly more awkward than the first but just take your time and work it gently closed It gets easier as you go along 10a b 7 9 8 9a 9b 1 0a You now have two flowers linked together by two rings and the wee beginning of a chain Put a twisty tie through one of the flowers so you have something to hold onto as you begin adding to the chain Again focus your efforts on closing the rings as perfectly as you can As you go along if you find that you ve forced a ring and the join doesn t meet nicely open it toss it aside get a new one and try again Your kit contains quite a few extra rings in both sizes Work slowly and patiently striving to make each join as neat and smooth as possible 11 Pick up another open ring with your pliers put a flower on it then run it through the last flower on your chain and close it Add a second ring alongside the one you just closed 11a b Beginning Weaves Flower Chain 03 10 pg 2 4 1 0b 1 1a Copyright 2003 10 Urban Maille Inc All Rights Reserved urbanmaille com KIT01 Flower Chain Weave Kit 4 7 Pick up a flower with the fingertips of your non dominant hand and hold it without disturbing the arrangement If you drop it or it slips out of shape just rearrange the rings so they overlap like fishscales as before 7 8
1 1b 12 Repeat that last step 11 until all your flowers are joined in a chain Measure the chain and use that figure to estimate the number of flowers you ll need to reach your desired length Make up the rest of your flowers link them all together and measure again until your chain is only the length of the clasp away from just right Attaching the Clasp Copyright 2003 10 Urban Maille Inc All Rights Reserved urbanmaille com KIT01 Flower Chain Weave Kit Use your pliers to gently open and shape the handmade sterling Balinese clasp included in your kit Open it enough to fasten without too much difficulty but not so much that the bracelet might come unhooked by accident Use wire cutters to clip off the loose ring that s attached to the loop at the bottom of your clasp Then join the loop to the last flower on one end of your chain using two 18g 4 0mm connecting rings as shown in this photo Attach the eye of the clasp to the last flower on the other end of your chain by opening each ring making up that flower and putting them one by one through the soldered eye ring This makes the eye ring snug but secure If the fit of the hook through the eye ring seems too snug you also have the option of connecting the eye ring to the flower using a set of two 18g 4 0mm connector rings instead Congratulations on the completion of your first flower chain Yay Kitpacks To make another bracelet just like this one visit the Kitpack section of our website and order the Flower Chain Bracelet Kitpack You ll get the same quantity of rings included in this kit plus the clasp all packaged in the same round tins that came with your kit Kitpacks do not include instructions tools or extras and the cost is commensurably less than the full kit Bolder More Delicate Versions of Flower Chain The sizes recommended here are perfect for our sterling palladium sterling and platinum sterling rings but might or might not work with rings made of other materials or with any rings made by other vendors Due to issues regarding springback the amount of tension in any given metal Argentium and copper rings are usually slightly tighter in small aspect ratios and slightly looser in large aspect ratios than traditional sterling rings so before ordering copper or Argentium rings in the sizes recommended here please check the Shop by Weave section of our website Our 18K gold rings have a bit more springback than sterling so they will be fine in these recommended sizes Made with 18K gold rings the chain might have a little more play in it but our gold rings are quite stiff so the finished chain will be even stronger than the sterling version This chart lists the ring sizes we recommend for Flower Chain as well as the number of rings per inch rpi required in that size Beginning Weaves Flower Chain 03 10 pg 3 4 Tip The clockwise rotation of the rings that make up the flowers causes the chain to develop a very slight spiral over its length This is rarely an issue with bracelets or necklaces but if you re making something that needs to be straight and symmetrical you can achieve that effect by alternating the rotation of the flowers so the spiral offsets itself In other words make half the flowers exactly as instructed here turning the second ring clockwise as far as it will go before adding the third ring Make the other half of the flowers the other way turning the second ring counterclockwise as far as it will go before adding the third Then alternate as you connect them together so that the first flower is oriented clockwise the second counterclockwise the third clockwise again etc This won t completely eliminate the tendency to spiral but it substantially reduces it When making earrings you ll get an especially nice effect by orienting all the flowers in one earring clockwise and all the flowers in the other earring counterclockwise This will cause the earrings to turn outward from center ever so slightly in opposite directions beautifully framing the face Recommended Ring Sizes inches width Flower perrings inch per ozt mm 12g 7 0mm 12g 10 0mm 3 0 4 85 10 3 4 9 18 0 14g 6 0mm 14g 8 5mm 4 0 6 0 14 7 7 1 15 0 16g 5 0mm 16g 7 0mm 4 5 7 5 25 7 10 9 12 0 18g 4 0mm 18g 5 0mm 6 0 9 75 38 1 20 0 8 5 20g 3 0mm 20g 4 0mm 7 5 12 0 60 8 31 5 7 0 22g 2 5mm 22g 3 0mm 8 0 15 0 122 0 51 0 5 0 24g 1 75mm 24g 2 5mm 13 0 21 0 162 0 78 7 3 7
Variations You can use flower elements as hinges between beaded segments on bracelets and necklaces This is especially dramatic with flower elements made in larger gauges You can use more than three rings to make up your flower elements just remember that the more rings you use the larger the aspect ratio of the rings will need to be You ll notice the connector rings are doubled around the outside of the triangle or flower shape but the spokes that connect the outer circle to the inner flower are single rings That s because the aspect ratio of the 18g 5 0mm rings isn t quite large enough to accommodate all those rings Use rings with a larger aspect ratio for the flowers if you prefer to double the rings throughout the pattern When making Japanese maille keep in mind that if the rings fit very snugly when the piece is flat it will be too rigid for a bracelet and better suited to a pendant and other flat designs In order to be flexible Another way to make flower chain enough to curve around as a sheet weave is to connect the a wrist or neck Japanese flower elements in circles made maille has to made so that of six flowers with another in the it looks a bit loose when center This is a form of Japanese lying flat These photos maille using flower elements in were taken on a slightly place of the doubled larger rings curved surface to better traditionally used This variation show the pattern makes a lovely wider bracelet as Use Limitations Apprentice Projects It can be difficult to know exactly which rights are granted with instruction of any sort so we include this section in an effort to clarify our policies When you know the Beginning Weaves you re ready for the Apprentice Project Kits pictured below Our Weave Kits Beginning Intermediate and Advanced teach chainmaille patterns many of them ancient that are not of our own design and reside in the public domain If you learn a weave from one of our Weave Kits and then wish to teach that weave you have every right to do so as long as you use your own photos or renderings and your own wording in the instructions Using our instructions even if you retype them and change some of the words is a violation of copyright and other intellectual property rights Some of our Project Kits Apprentice Journeyman and Master are simple variations of standard weaves and the same rules apply as described above Those marked as Urban Maille Exclusives however are our own copyrighted designs and do not reside in the public domain If you have purchased a kit you are granted the right to make and sell the piece as many times as you like but we reserve the right to teach those designs ourselves Because they are unique designs and we don t grant permission to teach them sharing or publishing ring sizes and other particulars privately or publicly or teaching them even with photos or renderings and instructions you ve prepared yourself is expressly prohibited and constitutes a violation of Urban Maille s copyrights and other intellectual property rights This kit is not an Urban Maille Exclusive Thank you for allowing me to be your instructor for this weave I hope that you re pleased and that you ll choose us again for your next adventure in this beautiful ancient art ly n Ais Beginning Weaves Flower Chain 03 10 pg 4 4 Copyright 2003 10 Urban Maille Inc All Rights Reserved urbanmaille com KIT01 Flower Chain Weave Kit Connect flower elements to each other in a grid to convert this pattern from a rope weave to a sheet weave The top photo shows three parallel rows of flower chain made exactly like your new bracelet attached to each other at the sides with pairs of connector rings This is a simple and beautiful way to make a wider flower chain bracelet well as triangle or diamond shapes for use as earrings or on necklaces